 Another boring presentation! |
We've all been there! Those boring powerpoint presentations where the font is too small, there is too much print on the screen and the presenter stands with their back to the audience while they read each slide verbatim. My problem is that corel presentations and powerpoint presentations are the only presentation tools I feel familiar with. With this mountain of new learning to scale why would teachers ever choose to use a multimedia presentation? Wikipedia explains that "multimedia represents the convergence of text, pictures, video and sound into a single form. The power of multimedia and the Internet lies in the way in which information is linked." Good multimedia presentations should be interesting and attractive. They should not only get your attention but hold it. Today's leading multimedia tools are interactive. The British firm Into Reality (2010) claims that "using an interactive multimedia presentation ensures that people remember your messages." If this is true, then educators should be embracing these tools! Playing around with presentation tools! Excitement! This is the post I've been waiting for. The one that gave me permission to use all of my spare time exploring tools that I've seen in other courses and a few that I've never heard of. I followed the trailfire for the course. I thought about grade levels and content that would be covered in the library this year, hoping to make presentations that I can use in my teaching and in turn model for a group of teachers. I found myself falling into a standard routine: explore, sign-up, view tutorials and read about the tool, try creating, share, think about applications, repeat with next tool! Here we go! Animoto I started with animoto. I began as usual by looking for background information. Wikipedia defines animoto as "a web application that produces videos from user-selected photos, video clips and music." This seemed straightforward. I went to the site and watched the video 'Learn More in 60 seconds', explored example videos under headings like: for business, for occasions and just for fun. This looked both engaging and fun. It was time to sign up. I clicked on the 'sign-up' button in the top, right-hand corner and perused my options: basic (free), all access ($30.00/year) and pro ($249.00/year). The basic option seemed quite limited, e.g. 30 second videos and no download capability. As I scrolled through this first screen, way at the bottom, in the left corner, in very fine type under the heading 'animoto for', I found the term education. I clicked on it and was directed to a sign-up featuring 'unlimited videos for you and your students'. I looked at the features and the case study and applied by providing my name, e-mail and school website. Unfortunately, that's it for now. I had two lovely e-mails quite quickly. One thanking me for my application and the other (see below) letting me know it may take a week or two before I'm 'accepted'.  Bitstrips Since I hadn’t heard back from Animoto I decided to look at BitStrips. Although they don't provide the same type of tool there is a direct link this year on our school image to Bitstrips, so finally, here is a site our school board is encouraging us to use. "We sold a license to the Ontario Ministry of Education....It just launched six days ago, and over 15,000 students have already signed up. They've been making over 1,000 comic strips a day" (O'Dell, 2009). I assumed I could just click on it and begin. Wrong! Again, I needed to sign up for an account by providing my name, e-mail, mailing address, phone number and school web site and just like Animoto – wait for a response. The wait was not too long. Within the hour I had a ‘welcome’ response. I clicked on the link provided, logged in and discovered that before I could really do anything, I needed to create a class by entering student names. I selected four library helpers to work with me and entered our ‘names’ by typing in our homeforms and initials, e.g. 5EJS. Once I'd created this mini class, I was ready to assign exercises. I worked through each stage both as the teacher administrator and as one of the students in my class. This allowed me to see and understand both views. Bitstrips is easy. The site provides activities to guide you through some of the basic skills needed to generate your comics. I assigned a new activity each day this week. I worked through the activity myself each morning and my helpers worked through the activity during their afternoon shelving time. In the time remaining they were free to explore and create comics. The first activity, “My life as a comic’ guides you through the creation of your own avatar. This was followed by, 'Express Your Feelings,' 'Fill in the blanks', 'Family portrait', and 'Body Language'. When in the teacher view there are six tabs: home, activities, comics, characters, students, forum and settings. The home view allows you to create your own avatar, view class avatars, highlights the access code for students, displays shared comics, lists activities in progress and prompts you to create a comic. Under the activities tab there are three options: my activities, shared activities and create new activities. Shared activities is where I selected activities for my class to try. My activities shows my completed attempts. The comics tab again prompts you to create a comic, lets you view class comics and moderate what is shared with the class. As the administrator of the class you can accept or refuse comics for sharing. You can also send a message as I did requesting some basic editing before the comic would be shared. The character tab prompts you to make your own characters and lets you view characters created by your class. Within the first 24 hours one student created over thirty characters. The student tab is the one that is not available in the student section - makes sense! This is where the teacher can view the student accounts, their names and passwords, activities assigned, completed and in progress, their comics, characters,and the last time they signed in. The forum tab is like the help button. It is searchable and is the place to ask questions and join in on the discussion topics. Finally we're at settings. In the settings tab you'll find your personal account information. you may select a variety of permission levels, e.g. you can restrict images of weapons, and you may delete or archive your class. The bonus of this comic site is that all of the artwork is provided. The child with the worst grapho-motor skills but a keen sense of humor can produce great looking work. Just like creating your mii for the wii, you simply click through a wide number of body types, features, colours, clothing and when you're ready to create your comic again you click or click and drag the backgrounds, props, speech bubbles, characters, etc. that you wish to use. There are advanced features that let you position characters and show movement. You can also download your own photos to work with. When students are finished they can continue editing their work, invite a classmate to work on it with them or submit it to their teacher. Once a comic has been accepted and shared by the teacher the class can make comments, send a smile and in this way the comic community begins. Teachers are always looking for tools that they can master and use quickly. This is definitely one. It would be easy to provide a professional development session simply run by creating a class with the teachers' names. I'd begin with an introductory video l ike this one: Then I'd have teachers create their avatars and work through a series of assigned activities culminating with a comic. Finally, I'd demonstrate the teacher's editing controls and the class sharing features. Be sure to point out that "students, individually or as collaborators, create characters and choose from a variety of scenes and props to create comic strips, which they can then share, print, and comment on. Teachers can review comics as they are created. We can see kids having a ton of fun with this tool and learning a lot about design, content creation, and media while they're at it," (O'Dell, 2009). Truly any area of the curriculum could be supported: e.g. math problems, media literacy, science experiments, book reports, substance abuse, music through the ages, etc. Be sure to share lots of examples as you take teachers through the program.  Glogster: While glogster wasn't on the list of 'should explore' tools, it is one of the extras we could explore and I've been fascinated with it since seeing it on the front page of other students' wikis this past summer. There is something about animation and hidden information that appeals to me. Of course I was disappointed to discover that glogster is blocked at my school. I find it eye-catching. It seems to fulfill the prerequisite desire to produce interesting, inviting work suggested by Into Reality. Still, I want to get a handle on it and then I’ll take on the battle of having the site freed for student use. Glogster "is a social network that allows users to create free interactive posters, or glogs. The glog, short for graphical blog, is an interactive multimedia image. It looks like a poster, but readers can interact with the content," (wikipedia) . My first disappointment when I opened the site was that there seemed to be a cost involved. Upon further skimming I found their educational freebie and signed up. It took me immediately to a white glogster canvas and I didn’t know what to do. I left glogster for awhile and looked for other 'how to' sites featuring helpful yet basic start-up information. Without paying anything I can apparently monitor the progress status of student glogs, , edit student accounts and have up to 100 student accounts. I watched some getting started videos and slideshows: When I first logged into Glogster Edu the first thing I did was start to follow on twitter and Facebook. Then I explored the dashboard. The first page let me find out more about Glogster Edu but I really wanted to view other creations. I was looking for inspiration! I had two choices. First I could look at new glogs or I could look at categories where 'the best' are featured along with every subject area possible. Of course the library heading was of interest to me. After looking at a variety of glogs, e.g. projects, book reports, stories, all about me...it was time to create. I've booked author Mahtab Narsimhan to speak at our school next Spring. I spent some time gathering information about her and her books and then began to create my first glog. I'm hoping that I'll be able to share it with students before they meet her. First you click on 'create a glog' on the top toolbar. The screen below will open. 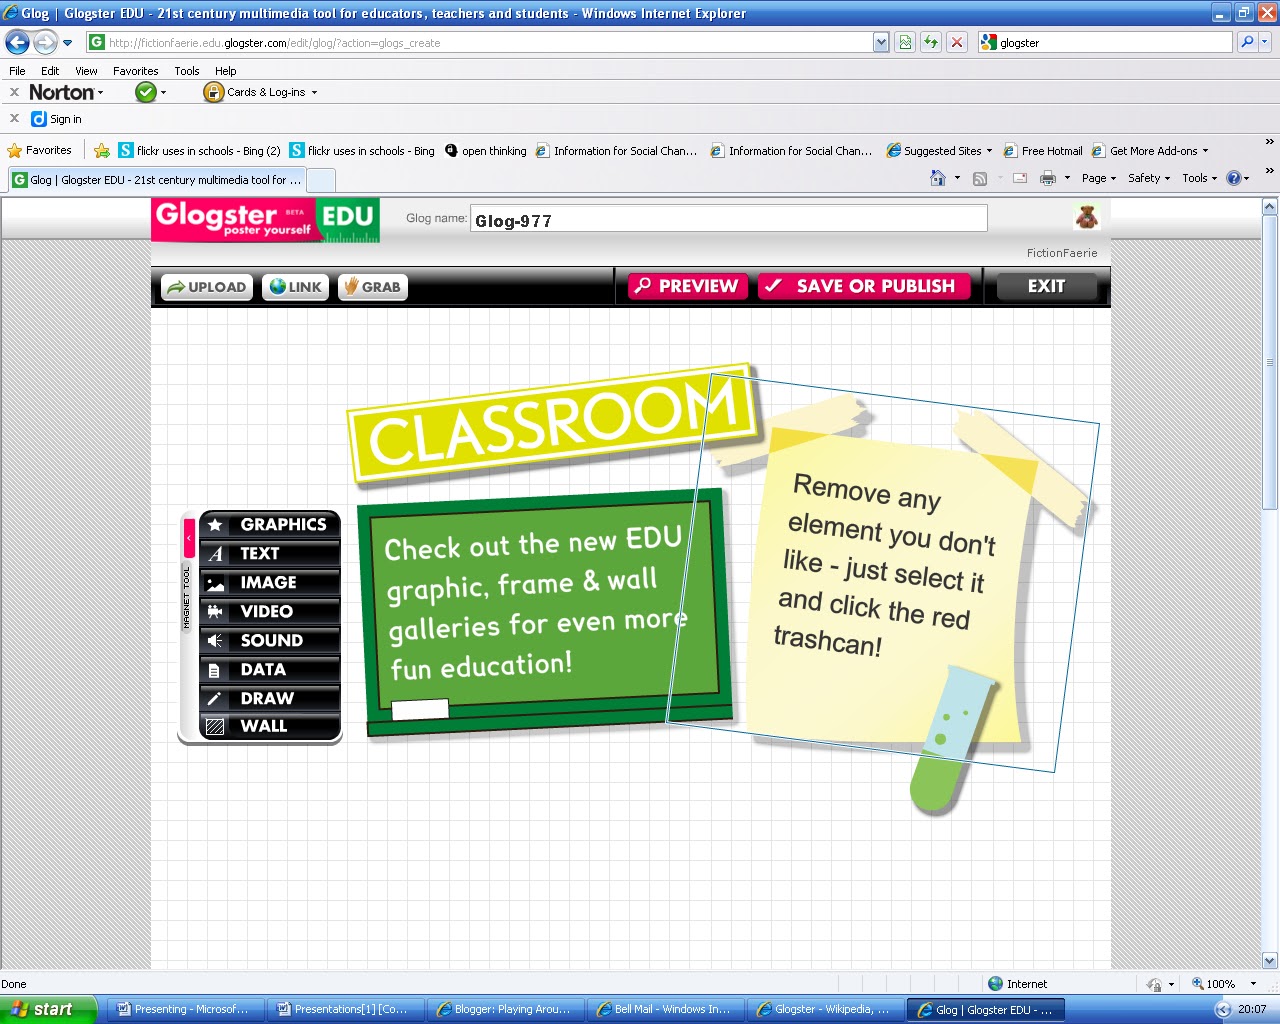 Using the toolbar on the left you can select a background (wall), add graphics, text, video, images, sound, data - you can even draw. You can add links, upload files from your computer and embed media from the internet. Here's my first attempt: Mahtab Narsimhan. Even though I'm finished for now, I have the option to edit or even delete this glog at any time. If I need support the final tab 'G-lab' is a discussion forum. This is the place where I can share ideas with other educators and ask questions. I can browse through old discussions as well. I can see glogster being a huge hit with students and teachers alike. The interactive nature of the posters is very appealing. It is easy to share with others. If I'm successful in having it clear our filters, then I can see using this not just to share inquiry but to promote the 'Forest of Reading' books and give students a chance to create glogs about the books and authors they will vote for. One of the most interesting glogs I've heard about is a virtual field trip created by M. Blazowski. "Blazosky conducts three virtual field trips per semester, carefully constructing each one with a trio of web-based technologies working in concert: Google Earth, Discovery Education Streaming and a new service called GlogsterEDU, which is the educational branch of the social networking site Glogster. She creates the itinerary for a trip by placing a pushpin at each desired stop on Google Earth's 3D image of the world. She then selects relevant videos from Discovery Education Streaming - or makes her own with the help of a green screen - and pulls interactive resources such as jigsaw puzzles and quizzes off the Discovery Education site or other web sources. Blazosky embeds all these instructional elements into a customized Glogster page, or Glog, which essentially is an interactive poster that comes to life with a click on any of the features built into it. One Glog featuring generally five or six activities greets Blazosky's students at every destination on their journey, " (Bowker, 2010, p.13). Prezi: Prezis are unique! The site highlights that it 'is the zooming presentation editor" (prezi). Sign up was very simple and free. Support was also immediately apparent. There are three basic tabs, 'create', 'learn' and 'explore'. The searchable 'learn' section provides basic, advanced and expert guidelines and tutorials, ideas and tips from Prezi creators and a reference manual. The tutorials were very straight-forward. As usual the explore tab, the place to view other prezis, provides both ideas and inspiration. After viewing a variety, e.g. seven wonders of the ancient world , math worm I was ready to begin. For my first prezi I took the information that I usually provide in a lesson that combines readers advisory based on the horror genre with storytelling. The lesson ends with some tips on how to tell a story. Key concepts and suggestions are usually displayed on chart paper and I can speak to each concept. This seemed like an easy thing to transfer to a prezi and it gave me a chance last week to share this tool with our grade four students and teachers. I expected this creation to be simple but instead I found working with prezi difficult. The zebra took a while for me to figure out and sizing remains an issue. I discarded nine creations before using the tenth (still can't say I'm satisfied with my creation). I felt that one of the greatest strengths of a prezi was the ability to show hierarchy, but I certainly haven't mastered the technique. Another unfortunate side effect was that I felt motion sickness. I found the never ending canvas a bit confusing. Although I took the time to not only input text but to import a few images, create a path and use frames I was not satisfied with the results. The students of course thought it was great. I think it would be interesting to see what students would create and while there is sophistication to this tool, I think that giving kindergarten students a chance to explore and create would be eye-opening. In the article Tech kids love (2010) they share that "Sweeney was worried about how her students would approach Prezi, but it came naturally. Technology seems intuitive to them," she notes. "And if they don't know how to do something, they figure it out on their own, or they ask each other." Voicethread: I've heard such rave reviews about voicethread, e.g. "One of the key components of VoiceThread is the possibility of inviting moderated audio or written commentary on the work created. Other children can leave audio or text comments on a piece of difital work, and children can interact with each other...How powerful is that as a way to create a sense of audience? There are many more VoiceThreads available online, spanning a variety of media genres including poetry, self-portraits, lectures, book reviews, mulitmedia presentations and digital stories," (de Ramirez, 2010, p.89). I couldn't wait to give it a try. The first trek off the pathway to success happened when I clicked on the K-12 link under 'products by market' . At first glance it appeared that you have to commit to a paid account. Upon further exploration I realized that they simply don't highlight the VTEducator account. I clicked on register. Provided the usual name, e-mail, password, etc. and voila – I had my voicethread account. The first thing I did was explore each section of the toolbar. In the 'about' section I get the basics: "a collaborative, multimedia slide show that holds images, documents, and videos and allows people to navigate slides and leave comments in 5 ways - using voice (with a mic or telephone), text, audio file, or video (via a webcam). Share a VoiceThread with friends, students, and colleagues for them to record comments too. Users can doodle while commenting, ..." (about voicethread) I then spent considerable time exploring the 'community' section. Under library, I took a look at some K-5 descriptions of voicethreads as well as listening to some voicethreads, e.g. 2nd Graders play I-Spy, Kindergarten Storybook from Leeanne Windsor and 4th graders study plants in collaboration with Pakistani students. From there, still under the community section I headed to resources and scrolled through each of the 4 recommended guides. I found the educator's getting started guide most helpful. It was simple, to the point and had lots of visuals! Since I've been working on speaking and writing in role with a class, I decided to create a voicethread where students could comment on storybook characters while in role as someone else in the story or as a bystander. Using puppet stick masks we took a few pictures and saved them to a file.  Under the create tab it was simple to click on the first button 'upload' and select the pictures for the voicethread. Step 2 is to add voice. Several students stayed in to help me. We plugged in a microphone and each one took turns clicking on the record (microphone symbol) and saying what they truly thought about Golidlocks and Mama bear.  Here we encountered our first real problem. All we could hear back was dead air - no voices. We tried different microphones and still had no success - we truly can't figure out where we went wrong and will have to seek some help. The type feature worked for us but we really wanted to hear students' comments ( Goldilock Voicethread attempt ). Our next problem: de Ramirez (2010) points out that "once you are satisfied with your VoiceThread, send the link to friends, colleagues...". This poses another problem for us as our students do not have e-mail accounts. Finally, Crane (2009) shares "multiple identities are available for one account, and identities can be monitored when messages are left because a Voice Thread attaches an identity to the comment," (p.139). I don't know why I can't figure this part out, but I simply don't see it. In spite of my technical difficulties (I'll continue to work this out) the ability to build community, see different points of view and develop language skills make voicethread a veritable gold mine for educators. |
Is PowerPoint a dinosaur? While one part of me would like to say yes, I still find many uses for it. I like Kist's (2010) idea of loading 'many pictures into a PowerPoint presentation that demonstrates how my own life has been shaped by such diverse texts as sitcoms...' (p. 12). There are still many teachers on our staff who have never created a presentation and I find this an easy place to start. I still use it occasionally, but try very hard to think about how the viewer will receive it. For example, while recommending horror books in our library I use a PowerPoint to establish the mood, criteria for the genre and to feature some key resources by including pictures of the front covers of books.
Presentations in my personal life:
While I'm excited to be learning about and using presentation tools as a student, I think that we tend to take presentations for granted. I see them on airplanes reminding me how to adjust my oxygen mask. I've seen them at church services, shopping malls, funerals and parties. I've even created a few for anniversary and birthday celebrations. In a few situations they are instructional or might be trying to sell something but most are used to invoke memories. As we all become more capable with these tools they will only permeate our lives even more.
Presentations in my professional life:
In my professional life I often would use a corel or PowerPoint presentation when I was in a situation where I was speaking to a group, e.g. student teachers, parents, a P.D. session for staff. I've also used this type of presentation to record inquiries, mind maps and to encourage visual literacy. Now I have a much larger repertoire to draw upon and a beginning understanding of the networking and community building that can be done with these tools. There are so many varieties of presentation tools available that we should be able to meet the needs of many learners.
I do have questions and concerns about the quality of presentations produced, the amount of time students spend looking at screens and how to encourage open-minded exploration by both teachers and students along with self-direction and choice. Kist (2010) tells students 'they can turn in their assignment in whichever medium they prefer - from writing an essay, to shooting a video, to doing a PowerPoint presentation," (p.16). I agree that there should be choice but I also feel we need to monitor the formats students choose (e.g. what do we do with the child who only submits essays) and make sure that they have experience with a variety of formats.
When modeling tools for teachers, I'll draw on the following advice, "As you get ready for this school year, choose one technology skill or tool that you want to perfect. "Technology can seem overwhelming," says Grube, "so pick one area that's of interest to you and start with that one" (Tech kids love, 2010). No longer should teachers feel isolated. With presentation tools simply a click away there should be no lack of resources, " "My students can now see the world from our classroom," says Blazoski," (Bowker, 2010 p. 13). When considering digital storytelling "the notion that in the not (too) distant future, sharing one's story through the multiple mediums of digital imagery, text, voice, sound, music, video and animation will be THE PRINCIPAL HOBBY OF THE WORLD"S PEOPLE" (quoted in Fryer, 2007)" (de Ramirez, 2010, p.89.).
Siemens (2010) pushes us to consider or reconsider our views and values about technology. Several of his points really resonate, e.g. 'Does technology use vary by age?' I think what should vary by age is the curriculum not the use of technology or a particular web 2.0 tool. Similarly when he asks, 'how can educators implement (whatever tool) into their teaching?' I have to agree with his attitude of 'just do it'. When collaborating with teachers they often want an idea of what the final product should look like and again I think we need to say, whatever your students can dream of. Really the universe is at our feet with presentation tools.
References
Bowker, M. (2010). A virtual ticket to ride. The Journal, 37(5), 13-14.
Crane,
de Ramirez, L. (2010). Empowering English language learners with tools from the web. Thousand Oakes, CA: Corwin.
Into Reality
http://www.google.ca/imgres?imgurl=http://intoreality.co.uk/images/multimedia.png&imgrefurl
Kist, W. (2010).The socially networked classroom: Teaching in the new media age. Thousand Oakes: CA, Corwin.
O'Dell, J. (2009.) Let them make web comics: Bitstrips comes to schools. Read, write, web. September 30, 8:21 p.m. http://www.readwriteweb.com/archives/let_them_make_comics_bitstrips_comeset_them_make_comics_bitstrips_comes_to_schools.php
Richardson, W. (2010).
Wikipedia
(2010). Tech kids love. Instructor, 120(1), 38